Path to Eternus

Choose one part of your play to work on for the next few matches. Pay attention to the decisions you make during the game, then use a replay to examine moments you could not judge clearly while playing. When you can recognize the situation and respond reliably, add another focus. You can return to an earlier lesson whenever the same mistake begins to recur.

01 · Moving While You Fight

Movement is useful when it changes how safely you can deal damage or reach your next position. If you enter an exchange with enough speed to slide, you can keep aiming and shooting while moving toward cover. Stopping as soon as an enemy appears gives them an easier target and may leave you farther from safety than you realize.

Consider a fight across a street. A slide can carry you toward the next corner while you shoot, but continuing past that corner may expose you to a second enemy. Decide where you want to finish the movement before you start it. Slowing down behind useful cover is a good result even if you could have kept sliding.

During your next matches, pay attention to the first moment an enemy starts shooting you. Notice whether you keep moving toward a useful position or stop to concentrate on your aim. Practice keeping the target in view while reaching that position. If the dash-slide input itself is unreliable, return to Dash-Slide in Skills before trying to solve the whole fight at once.

You do not need to force a slide into every exchange. Normal movement may be enough beside a corner, and spending a dash just to slide can leave you short of stamina when an ability arrives. Judge the movement by where it takes you and what it leaves available.
Dash-Slide

02 · Keeping a Way Out

Before moving into a fight, identify where you could go if the enemy responds more strongly than expected. A nearby wall, a corner behind your team, or a ledge you can reach is more useful than a vague intention to retreat. Your escape needs to work from the position you are about to occupy, with the stamina and abilities you expect to have left.

For example, spending several dashes to reach a low-health opponent can put you close enough to attack but too far from cover to survive their teammate's arrival. You may have been better off taking a longer route, waiting for stamina, or letting that opponent leave. A dash-jump can make the approach faster, but it also changes what movement remains after you land.

Reserve enough movement for the route you actually need. There is no single stamina count that makes every fight safe: one corner may be close enough to reach on foot, while another position requires a dash or an available movement ability. Reconsider the route if an enemy moves into it or an ability makes it unusable.

When reviewing a death, go back to the approach. Look at what you spent before the fight and when the exit stopped being available. Also review escapes that barely worked. Surviving does not mean the approach was sound, and recognizing an avoidable risk is useful before it costs you a death.

03 · Fighting From Cover

Cover lets you decide when an opponent can shoot you. From a corner, you can step out to fire and move back while reloading or waiting for an ability. In the open, the enemy can keep dealing damage through those same moments. Choosing a nearby position with cover can change an exchange before either player lands a better shot.

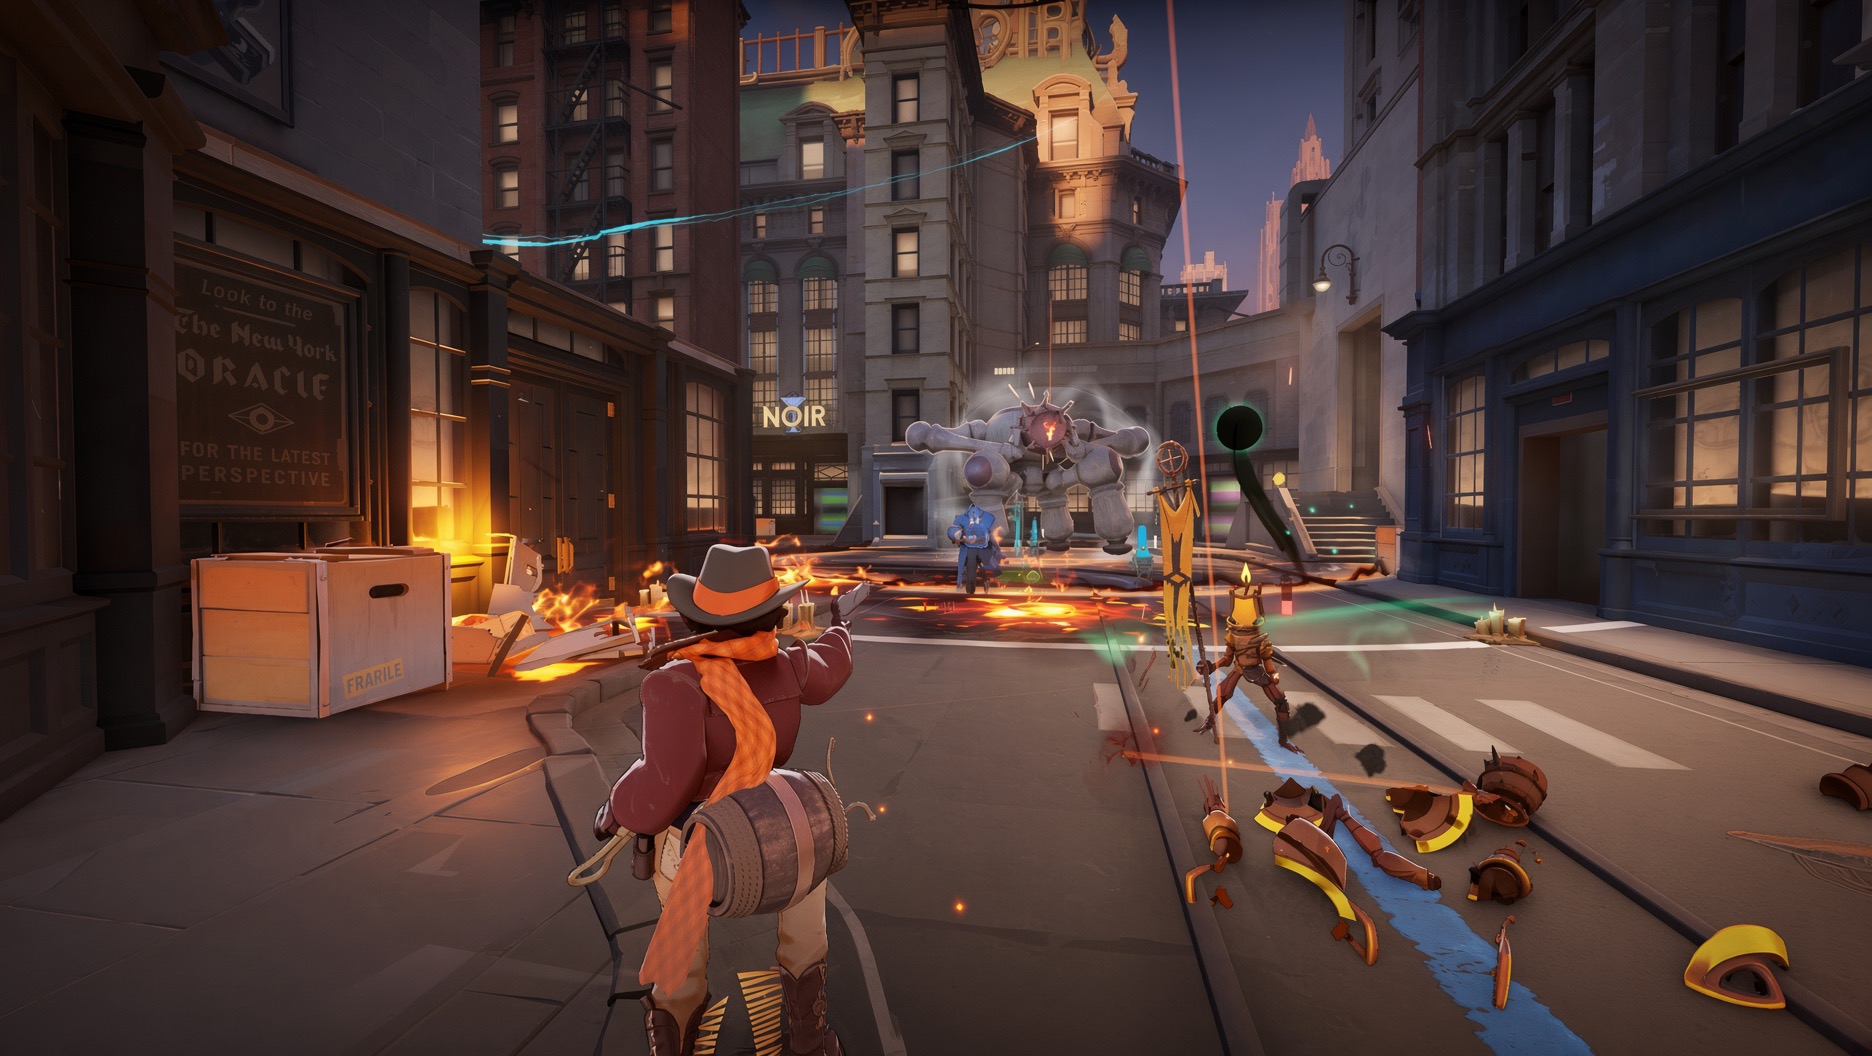
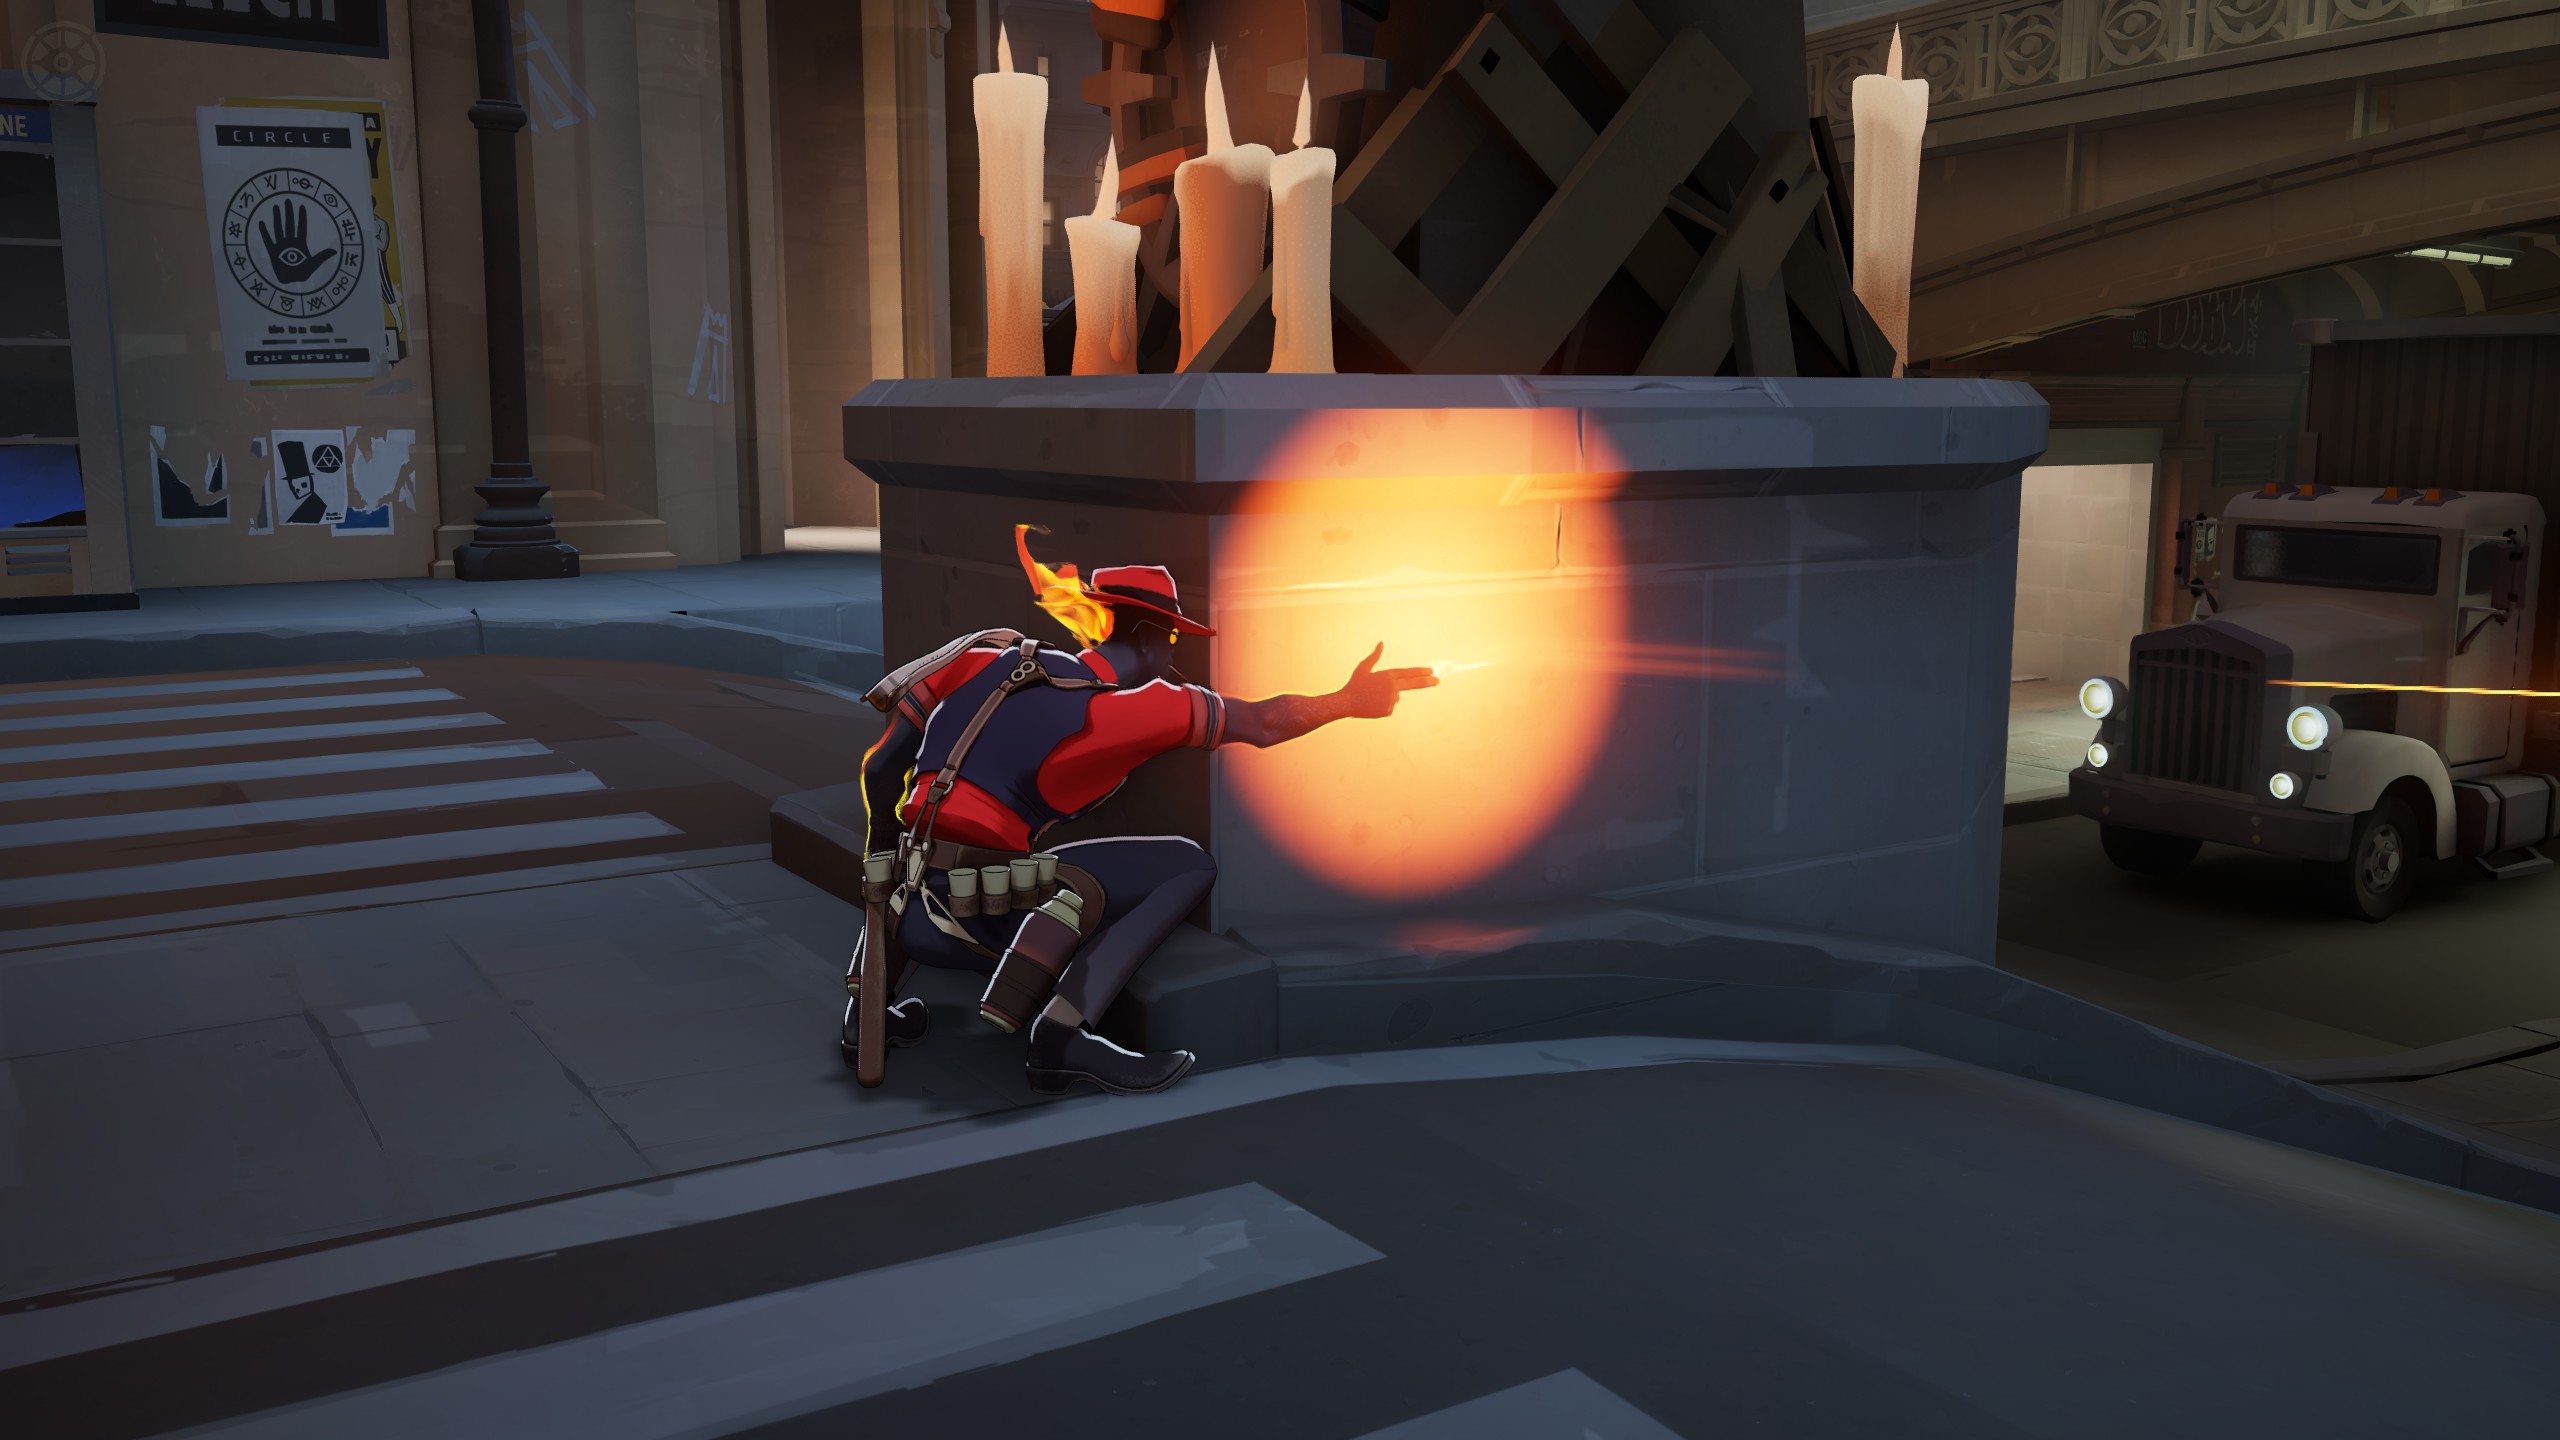
A hero fires from beside a stone monument topped with candles.
Fight close enough to the corner that you can return behind it between attacks.

Try to keep the target within useful range while leaving only a short movement back to safety. If an opponent is already aiming at the corner you keep using, change the timing of your next appearance or move to another position. Cover loses some of its value when the enemy knows exactly when and where you will emerge.

With teammates nearby, choose a position from which you can help attack the same enemy. Following someone around a building can separate you from every teammate who was supporting the fight. Before taking that next step, check whether you will still have help and whether the target's teammates can reach the other side first.

In a replay, pause where you first take sustained damage. Find the nearest usable cover and compare it with where you stood. Then look at the route you took to get there. This makes the correction specific: next time, approach along that wall or stop at that corner instead of trying to remember only that you should take less damage.

04 · Judging the Fight

Compare health, stamina, items, and important cooldowns before choosing a fight. These four factors explain much of what each hero can do next. They also affect one another: a health lead may disappear quickly against a newly completed damage item, while an opponent with strong abilities may be vulnerable just after using them.

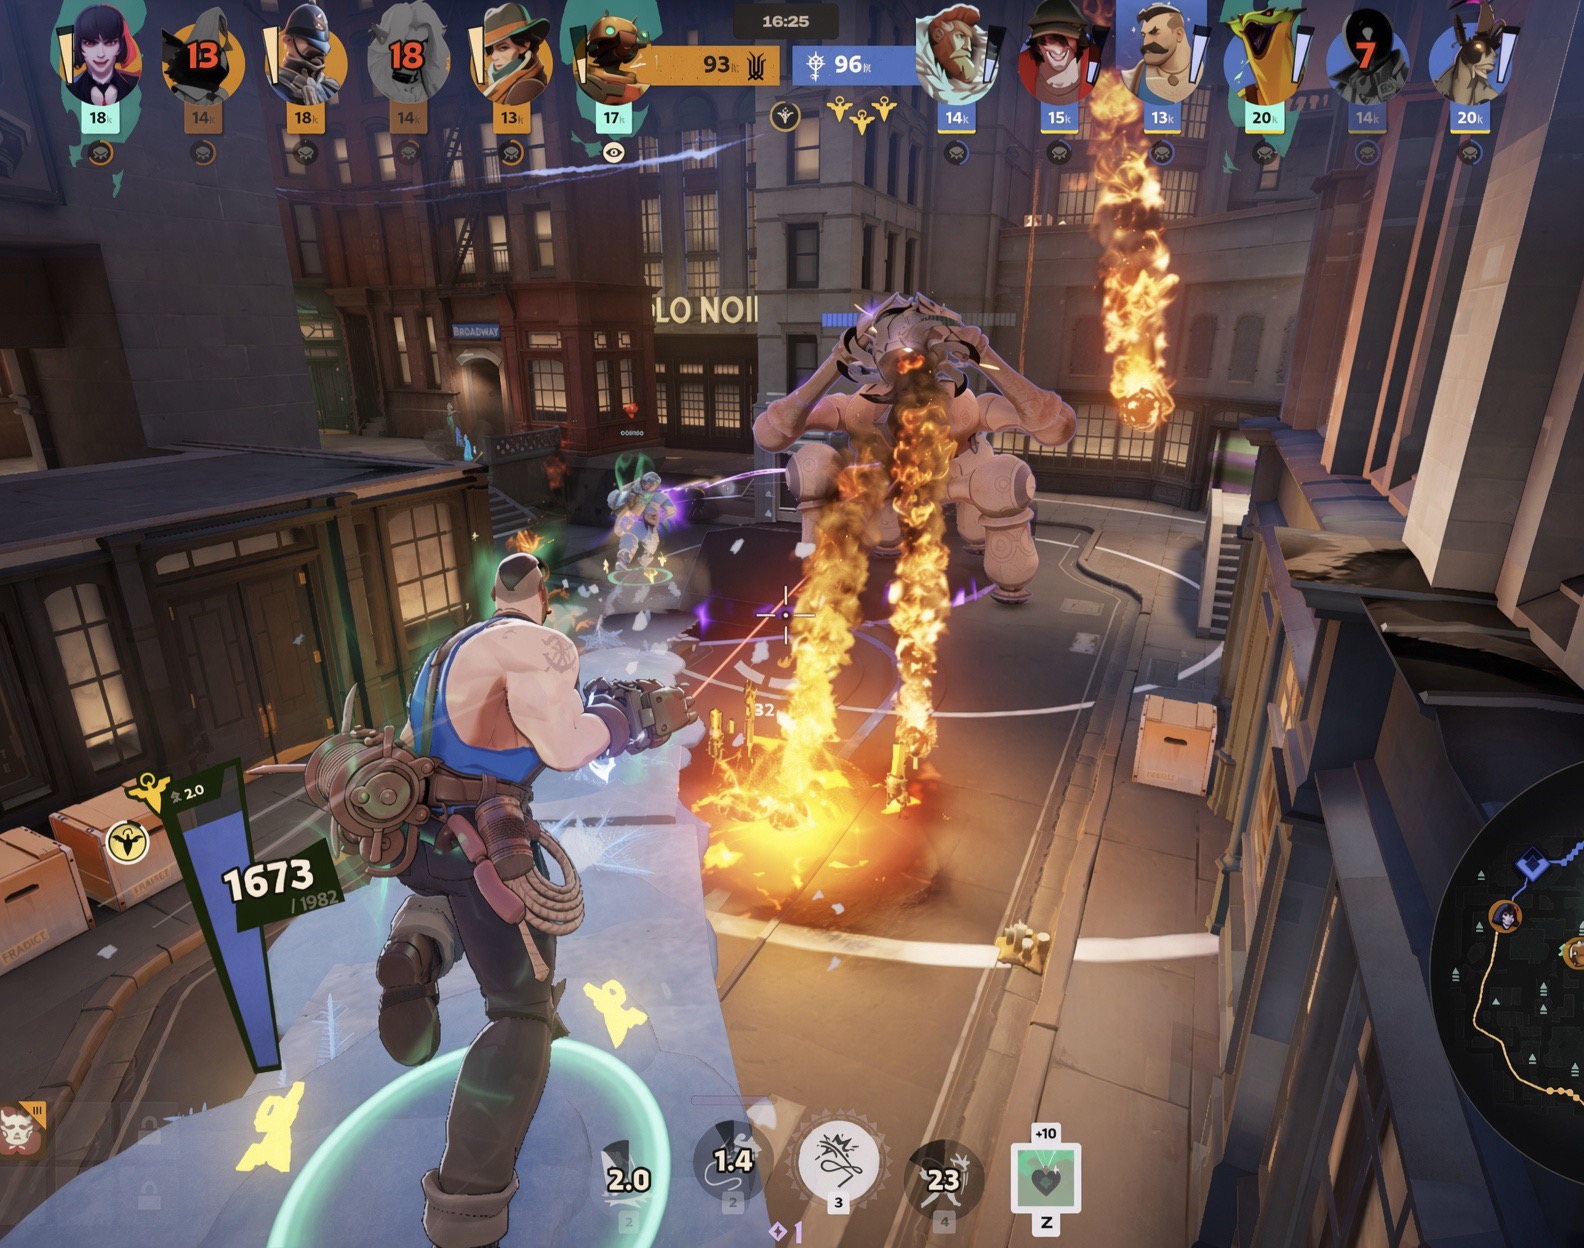
A teamfight with the player HUD visible.
Health, stamina, items, and important cooldowns help you judge whether a fight favors you.

You can inspect items, but you will often have to infer enemy stamina and cooldowns from what you have seen. An opponent who has just dashed repeatedly or used their escape has shown you something useful. If you did not see their strongest ability used, allow for it to be ready. Do not turn missing information into an assumed advantage.

Imagine an opponent retreating with less health than you. Before following, check your own stamina, whether your main ability is ready, and what they recently bought. Then account for the space you would enter and the teammates who could join. An enemy on low health can still win the exchange if you arrive without the tools to finish it or leave.

Review a few fights from the moment before you chose to enter. Explain what made you expect the fight to work, using information available at the time. If the explanation rests only on their health bar, look for the factor you overlooked. The aim is to recognize useful opportunities without requiring certainty that the game cannot give you.

Parry

05 · Keeping Your Lane Income

A safe wave gives you income you can collect immediately. Leaving it for a distant fight or a long chase means giving up that income in return for a result you may never reach. Over several minutes, these small departures can explain why an opponent has completed an item while you are still saving for it.

Troopers approaching an enemy Guardian.
Collect the available wave, then judge whether leaving gives you a better opportunity.

Finish the troopers you can safely reach, confirm the floating souls, and collect the ground orbs. Use melee when the position allows it, and take denies when you have a safe shot. Then look at the next wave and the map before deciding to leave. Clearing the current wave does not automatically give you enough time to cross the map and return.

There are good reasons to leave income behind. You may be able to save a nearby teammate, stop a push that threatens your base, or join a fight your team can win with your help. Consider how soon you can arrive and what your presence changes. A fight that has already ended offers a different choice from one where your teammate needs help now.

For one match, review the waves you missed while alive. Separate the ones you could not safely approach from the ones you left by choice. For each voluntary departure, compare what you gained with what you gave up. This helps you improve the decision without treating every missed trooper as a mistake.

Melee Secure · Soul Confirm and Deny

06 · Finding Time to Buy

A useful purchase changes what you can do with the next few minutes. It may let you clear a camp faster, remain in lane through repeated damage, or survive an ability that has been forcing you back. Know which item you are working toward and why, so reaching its price leads to a deliberate shop visit instead of another uncertain stretch of saving.

Whenever possible, arrange the visit around your wave. Pushing your troopers into the enemy's defenses makes the opponent spend time dealing with them and gives you a chance to leave. Decide what to buy before reaching the shop, use the purchase queue if it helps, and take a route that gets you back to useful play promptly.

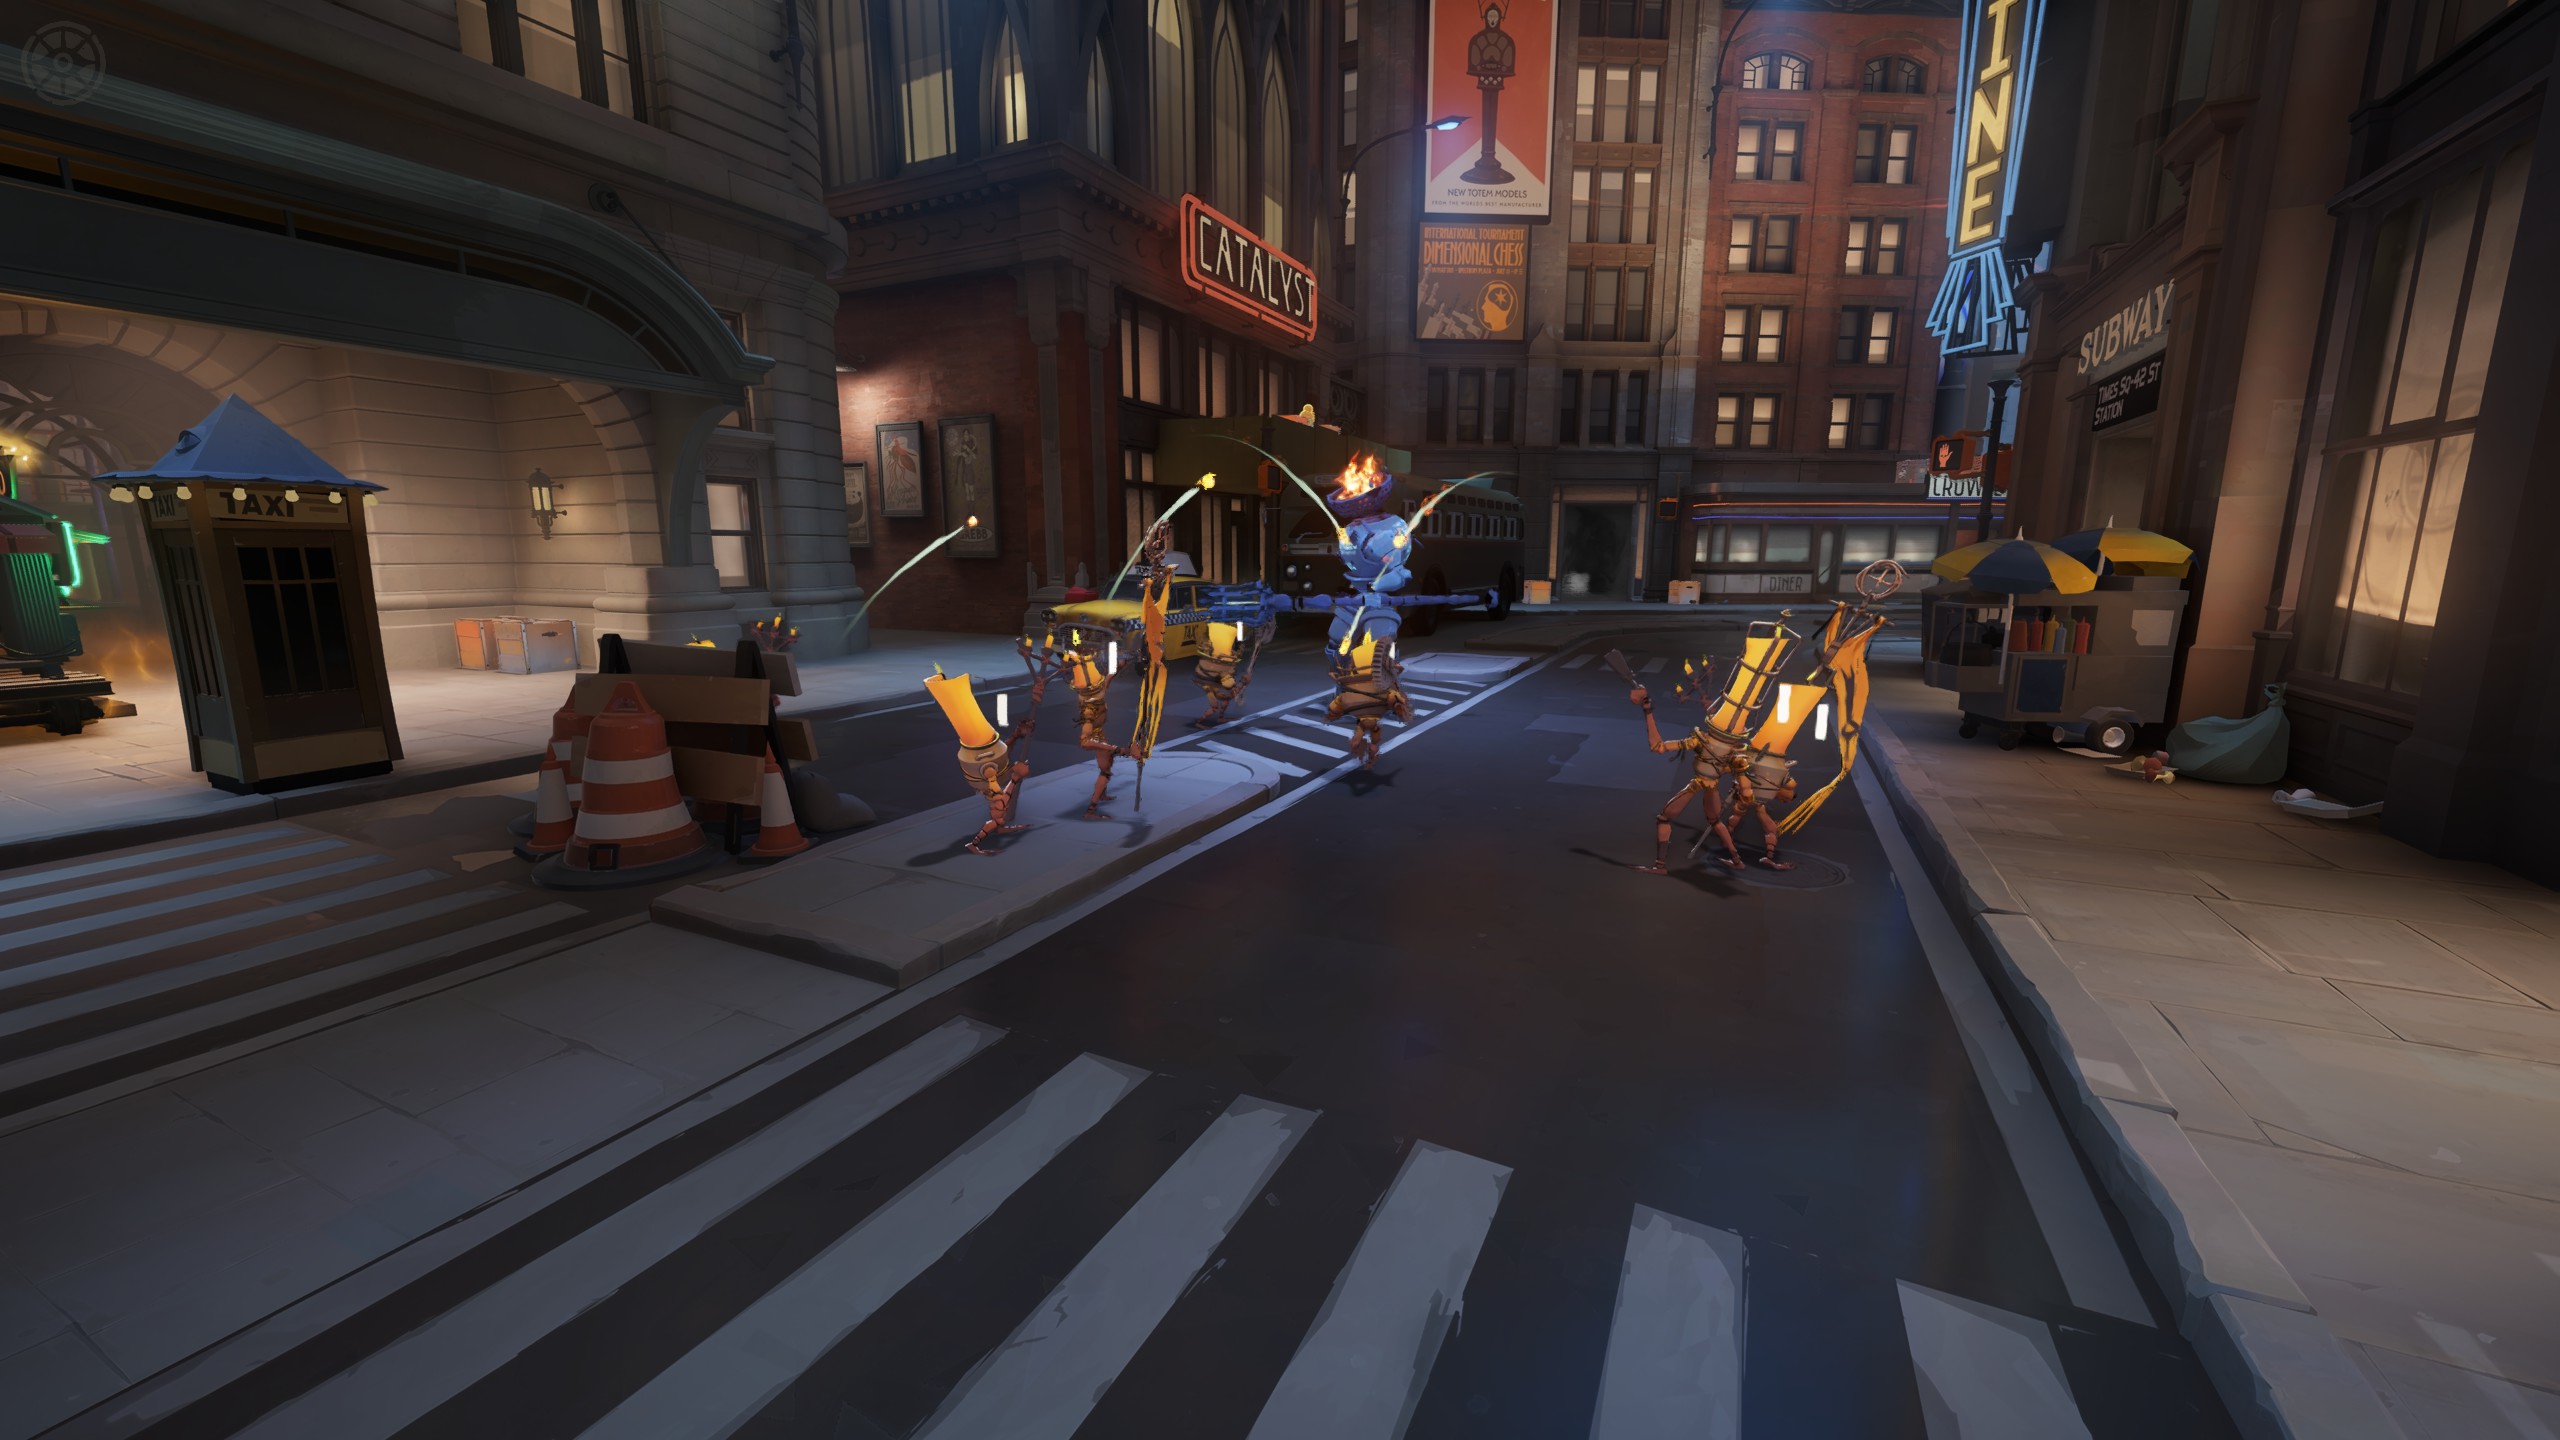
A trooper wave pushed up to an enemy Guardian in the lane.
A trooper wave crashed into a Guardian

Sometimes you cannot create that comfortable opportunity. If you are too low to remain in lane, waiting for a perfect wave position can cost a death. Recover and buy what helps you return. At the other extreme, taking another camp after you can already afford an important item may delay a purchase your team needs for an approaching fight.

Review both kinds of delay: trips where a wave died while you browsed, and stretches where you kept holding enough souls for a useful purchase despite having a safe chance to buy. The correction may be planning the item earlier, pushing before leaving, or recognizing that you already had enough to return stronger.

07 · Using the Time Between Waves

A wave at the enemy's defenses forces the opponent to choose between clearing it and letting the structure take damage. While they deal with it, you may have time to collect nearby income, buy, or move toward another useful play. The amount of time depends on the wave position, how quickly it will be cleared, and how far you need to travel.

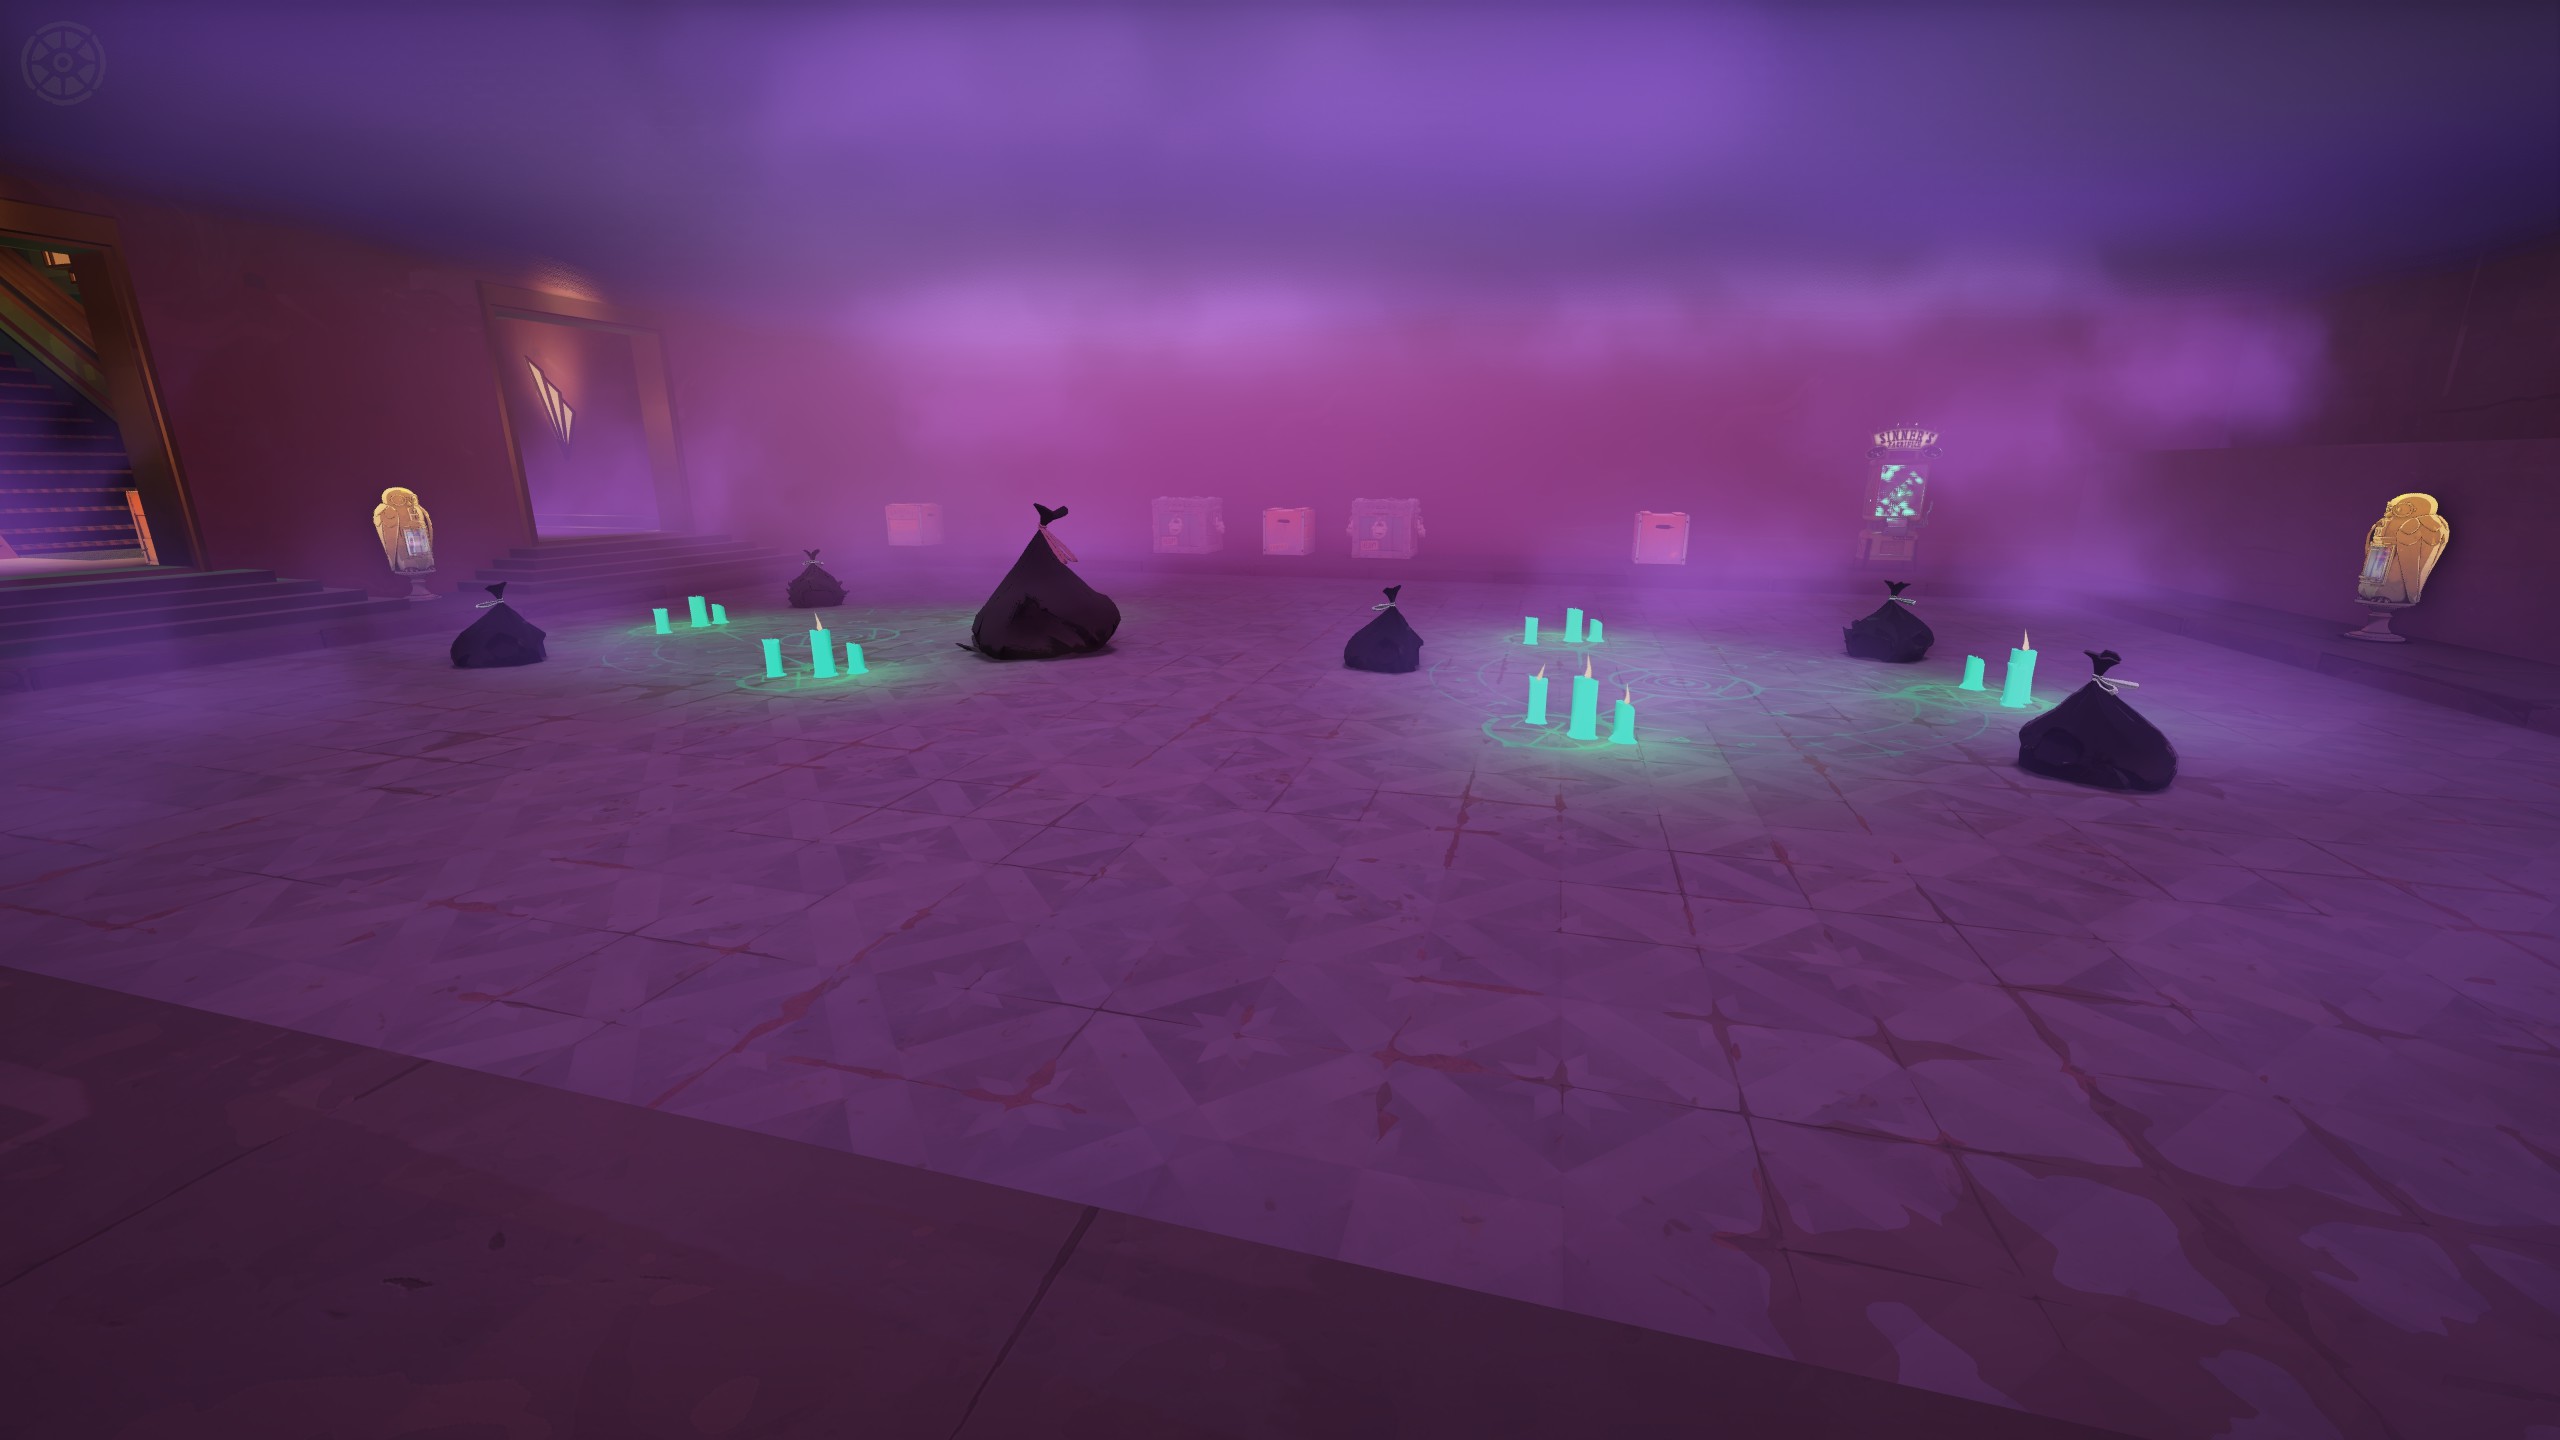
Haunts and glowing candles in the purple haze of Sunken Plaza.
Haunts in Sunken Plaza.

Choose something that fits the time you have. A nearby camp may be a good choice if your hero clears it quickly. Sinner's Sacrifice may be useful if you have enough health and the area is safe. Breakable objects already along the route can add income without taking you far away. Estimate the trip back as well as the time spent collecting.

Recheck the lane before starting another camp. The first detour may fit comfortably, while a second keeps you away until the next wave dies. There is no need to force exactly one camp every time; what matters is returning before an avoidable loss, or choosing a better play that justifies staying away.

In your next replay, follow a few trips from the moment you leave lane until you return. Look for the point where an efficient trip became too long. If that happened because you kept adding nearby resources, decide in advance where the next trip will end. Open-Map Income covers how to make these choices once several players are moving between lanes.

05 · Keeping Your Lane Income · Open-Map Income

08 · Checking Whether You Can Finish

An objective being available tells you where a reward is, but it does not tell you whether your team can safely take it. Before starting a major play, compare the players who can help you with the enemies who can reach it. Death timers, visible enemy positions, and missing heroes all affect how much time you have.

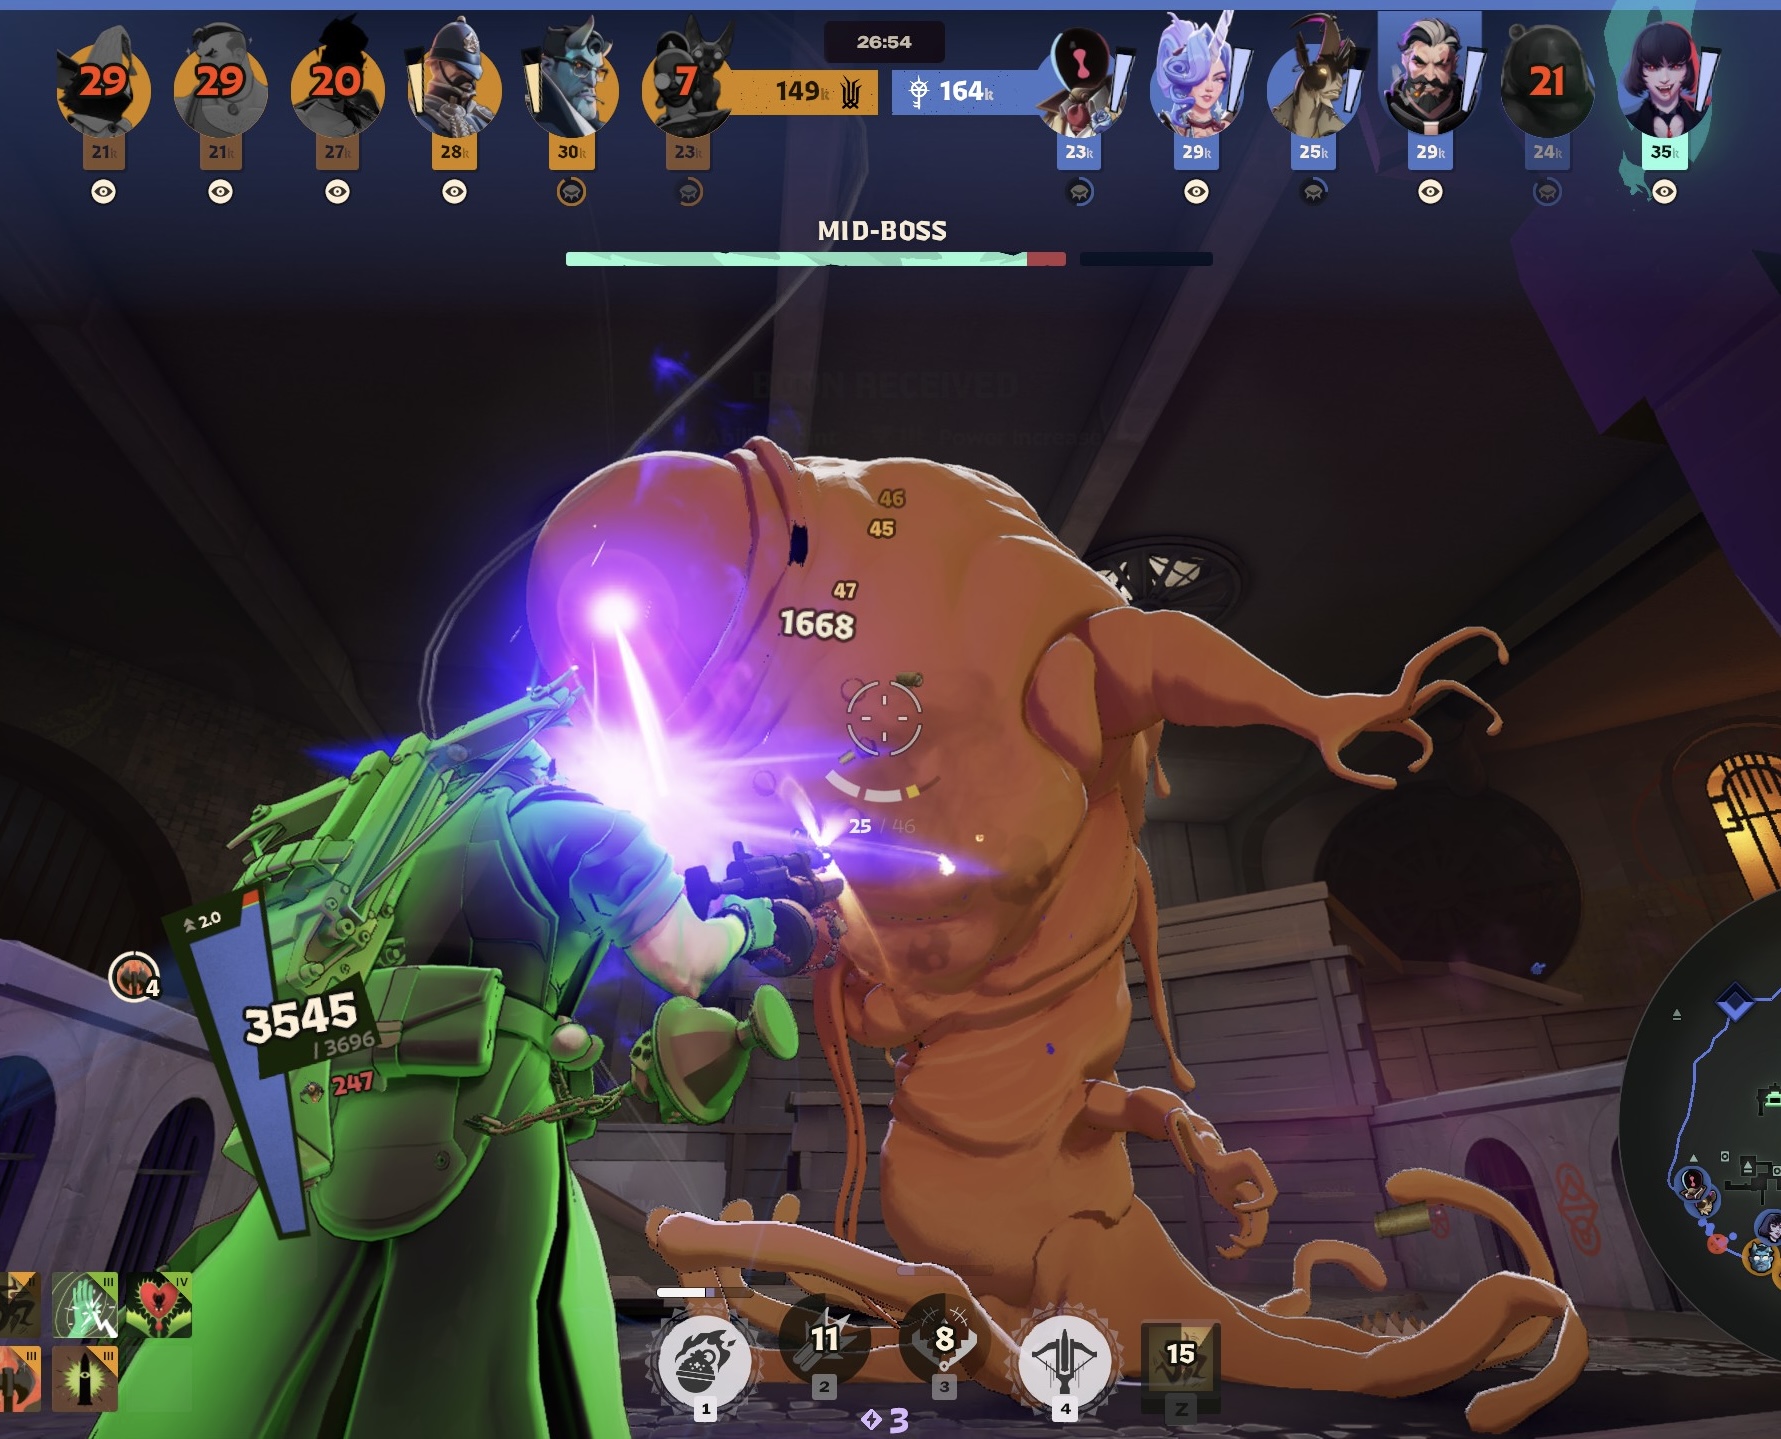
The Mid-Boss area with the minimap and player status visible.
Account for missing enemies and travel time before deciding whether your team can finish.

Suppose two enemies are dead and your team is near Mid-Boss. You still need to consider the other four. If several are missing and one can contest the Rejuvenator, starting immediately may expose your team to a fight in the pit. If those enemies are visible far away and your team can finish quickly, the same objective may be a strong choice.

Include travel time in the decision. A dead enemy's timer is only part of the gap before they can return, and your own teammates may also need time to arrive. Check whether you have the health, damage, and important abilities to complete the play. Beginning with a temporary advantage is not enough if it ends before the reward is secured.

Pause a replay just before your team starts an objective and make the decision using only what was visible then. Resume to see when the enemy could actually contest. Look for information you missed, such as a nearby enemy who had disappeared or a teammate who was too far away to help. That is more useful than judging the call only by whether your team happened to get away with it.

09 · Following Up a Won Fight

After a fight, look at the map before following the next retreating enemy. Your team may have time to destroy a structure, deliver the Urn, secure Mid-Boss, or move a wave into a better position. Each option has a different travel time and risk. Choose something your remaining players can finish with the health and abilities they still have.

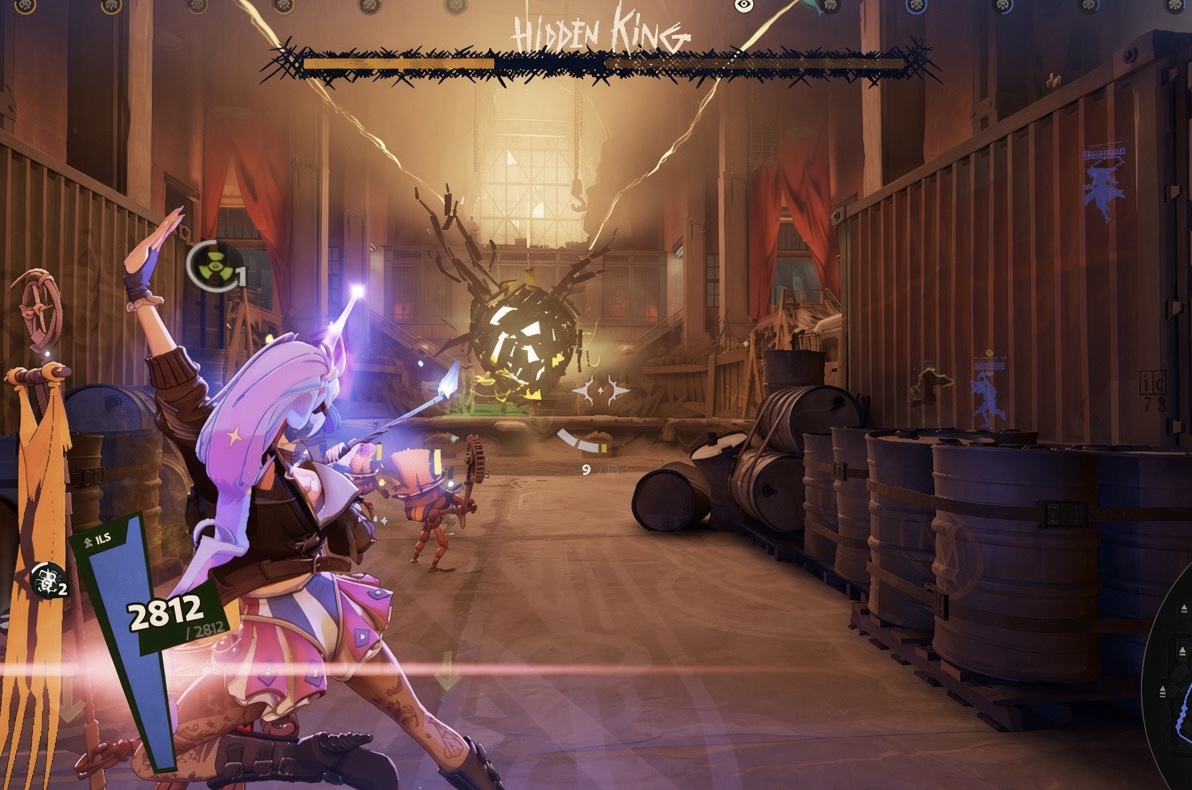
The Hidden King inside the base.
Use the time after a won fight to finish an objective your team can safely reach.

If a structure is nearby, check whether your troopers are close enough to support the push. Helping them reach it may accomplish more than running ahead and attacking a Protected target. While some teammates deal damage, others can watch an entrance or prevent a defender from interrupting the push. Useful participation does not always mean everyone attacking the same object.

Keep the enemy's return in view. A short push followed by a safe retreat can leave you with a destroyed structure and enough time to buy. Staying for a second target after the defenders return can give away the advantage you just earned. If your team is too low or too scattered to take anything safely, recover together and spend the souls from the fight.

When reviewing a win, follow what happens until the next fight begins. Note what your team gained, how long you spent choosing, and whether anyone was caught after the opportunity had ended. Choose one correction for the next match, such as moving the wave forward sooner or leaving as the first defenders return.

08 · Checking Whether You Can Finish

10 · Moving Efficiently Around the Map

Moving quickly matters because of what it lets you reach. You may be returning for a wave, joining teammates before a fight begins, or leaving an area the enemy is about to control. Choose that destination first, then look for a route that gets you there with enough health and stamina to act when you arrive.

Read the terrain ahead as you travel. A low ledge may let you mantle-slide toward the next corner. A nearby wall may give you the height to reach a passage without another dash. A ramp or staircase can carry you downhill in a slide, and enough running speed can start a slide on level ground. These opportunities let the map provide some of the movement you would otherwise pay for with stamina.

Connect each movement to the next piece of ground. As you clear a ledge in a mantle slide, look toward the wall, slope, or opening that follows. Use a wall jump when its landing takes you closer to your route, and carry useful speed into a slide when you return to the ground. Where the gap needs more distance, a dash-jump can connect the route, but account for its additional stamina cost before committing.

Connect movements along your route without stopping between them.

A route between lanes might use a mantle slide over a low barrier, a wall jump onto a connecting ledge, a slide down the far staircase, and a dash-jump across the final opening. Learn each transition separately, then join them without stopping to line up the next move. Use the movements the terrain calls for; adding another jump can make a route slower if you have to turn back or correct the landing.

Compare that route with the straightforward alternatives. A safe zipline or sewer connection may reach the same place sooner, and a covered street may be the better choice when enemies are missing. Recheck the map before the exposed part of a crossing. If the destination becomes unsafe or the fight ends before you arrive, change the route while you still have options.

Practice a journey you make often with the hero and movement items you normally use. Compare the time to arrive, the stamina left, and the position where you finish. Then watch the same journey in a match replay. Look for pauses at ledges, unnecessary dashes, and landings that force you to retrace your steps. Improve the transition that repeatedly costs you time, then test whether the whole trip has become more useful.

Sliding · Mantle Slide · Wall Jump · Dash-Jump · Zipline Control

Reviewing Your Progress

Keep your next practice goal tied to a situation you can recognize. “I will check my escape before using my last dash to approach” gives you something to notice and repeat. “I will play better” does not tell you what to change when the same moment arrives.

Use short replay reviews to find that moment. Start just before the decision, look at the information you had, and identify an action you could reasonably have taken. Then watch what happened. Include successful plays as well as deaths so you can recognize a sound decision even when the execution still needs work.

As a decision becomes more reliable, add another focus while continuing to notice the earlier one. If a familiar mistake returns, revisit the relevant lesson. Improvement will not appear evenly in every match, but you can track whether you recognize the situation sooner and make a more deliberate choice when it happens.